
Get Eggcited for Easter!
There are many things that people look forward to when it comes to Easter. Whether that be egg hunts or easter baskets, there is one thing that is usually a tradition in every household, and that is egg dying. Coloring eggs is a fun and creative way to celebrate the season. So, without further ado, let’s get started!
The first step to coloring eggs is getting all the materials. You will need: eggs (white eggs will look better when dyed), food coloring, vinegar, and cups to put the vinegar in.
First, pour about one cup of vinegar into each cup you will be using (each cup will be given a color), then add the food coloring, making sure you remember which color went into which cup. It can be difficult to find food coloring in purple, green, and orange so, if you want a purple color, mix the red and blue food coloring. For a green color, mix the yellow and blue, and an orange color, mix the red and yellow.
Second, just place the egg in whatever cup you want, for as long as you want (helpful hint: the longer you leave the egg in the color, the brighter the color will be).
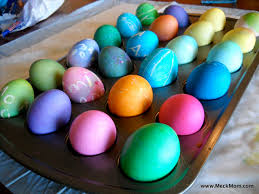
Easter eggs are really easy to make, but if you find that you want more design on your eggs, take a wax (or white) crayon and draw a design on the egg. Then place the eggs in the dye, and when you bring your egg back up, your design will appear.
Also, some people like multicolored eggs, so take a spoon and lay the egg down on it’s side. Then place the egg in the cup, so only half the egg is submerged. Once you are happy with the color, flip the egg over onto the side that is not yet dyed, and submerge that side into another color. Voila, you have a multi-colored egg!
Easter is a time for fun and celebration, and the eggs are just one part of that.